DIY Face Wash – Facial Cleanser for All Skin Types
Forget expensive department store facial cleansers. Make this DIY Face Wash recipe for just $2 with all-natural ingredients you already have at home. It’s great for all skin types and so nourishing too.

Benefits of a DIY Face Wash
- Avoid Harsh Chemicals: Making your own natural face wash allows you to avoid harsh chemicals that can strip your skin of its natural oils and cause irritation or breakouts.
- Quick and Convenient: It only takes a couple of minutes to whip up this DIY face wash using simple ingredients likely to already be in your home. Not only will this save you time instead of hopping in the car to the store, but it means you can create some any time of day or night when your current face wash runs out.
- Customization: You can customize the ingredients based on your skin type and concerns. For example, lavender essential oil can help soothe skin, or a little pumpkin seed oil can help fight acne. Your skin health will naturally have good days and bad, so play around with my customization suggestions below so you can use this DIY face wash all year round.
- Cost-Effective: This is embarrassing to admit but I used to think high-quality facial cleansers HAD to cost money. I used to shell out $30 for a popular department store brand of facial cleanser for just 6 oz. and it would only last 1-2 months. Then, I’d still spend upwards of $100+ per month on a skin regimen of a cleanser, toner and moisturizer thinking my skin would benefit from these expensive products. Crazy right? Little did I know that I could make my own natural skin care products – like this DIY face wash and facial cleanser. Making your own natural face wash can be more cost-effective than buying commercial products, as many of the ingredients are readily available and inexpensive.
- Small Batch: On the topic of expenses, making this DIY Face wash in small batches is also a huge benefit. It means you save money as you don’t need to buy a new face wash every time your skin concerns change. It also means if it doesn’t work for you, you haven’t wasted a ton of money or ingredients, you can simply switch up the ingredients and try again.
- Eco-Friendly: I’ve quickly realized that DIY natural skin care products are not only great for my own skin health, but the planet’s health too. By making your own DIY facial cleanser at home, you can reduce the amount of plastic packaging as well as chemicals that end up polluting our waterways. Not to mention less trips to the store which is always a bonus.
Ingredients to Make Face Wash
- Castile soap – It is a gentle cleanser that helps to remove dirt, grime and make-up without stripping the skin.
- Almond oil – Almond oil helps to moisturize skin and provides essential vitamins to give skin a healthy glow. It also helps to remove make-up and oily build-up. It’s inexpensive and great for all skin types, particularly dehydrated skin.
- Vitamin E oil – Ideal for a DIY face wash recipe as it helps to nourish skin and give it an extra boost of vitamins. Vitamin E oil is also known to help reduce hyperpigmentation and wrinkles as well as help maintain healthy, glowing skin.
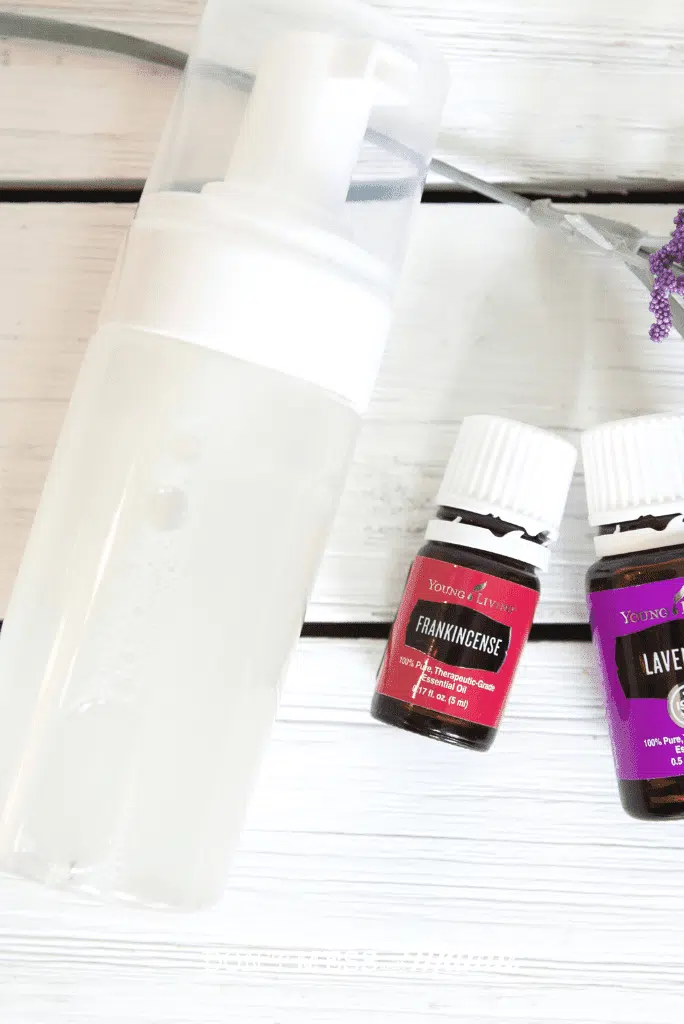
- Frankincense essential oil – Frankincense is a powerful essential oil and ideal for adding to this homemade face wash. It is an effective way to calm the complexion naturally as well as help even skin tone and enhance your natural glow.
- Lavender essential oil – As it naturally reduces redness and helps to clean the skin’s surface without stripping its natural oils, lavender essential oil is a perfect addition to my DIY facial cleanser.

How to Make This DIY Face Wash at Home
This post contains affiliate links. Please read my affiliate disclosure.
It’s pretty easy to make this DIY Face Wash (aka homemade facial cleanser) recipe. You just need liquid castile soap, water, essential oils and carrier oil mentioned above.
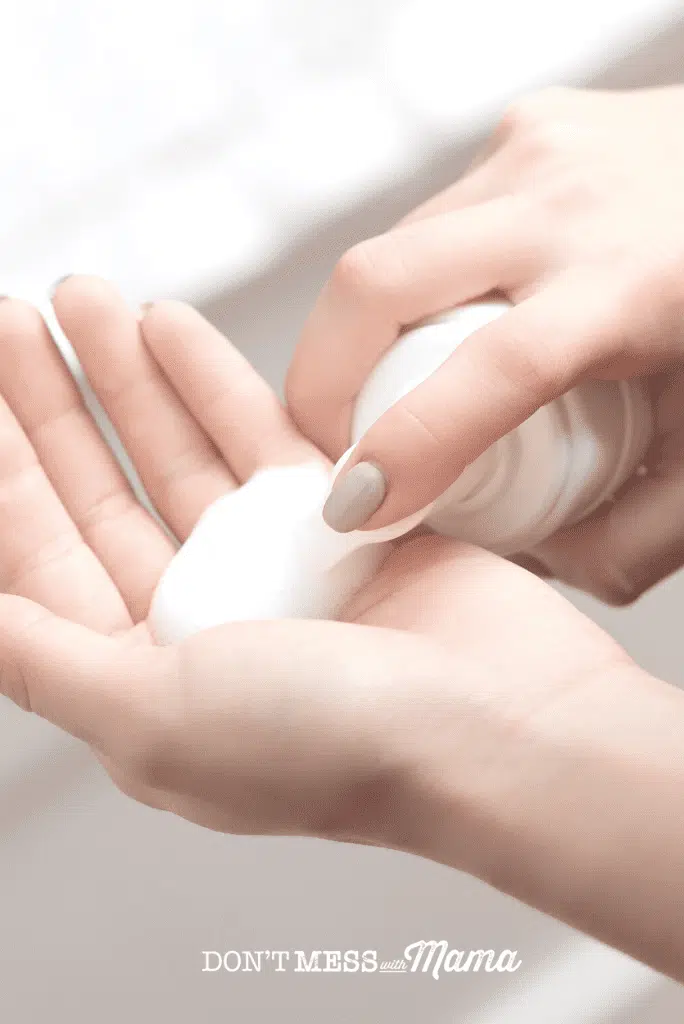
- Simply, pour the ingredients into a foaming soap container.
- Shake the container well to combine as well as before each use.
- Use daily or as needed.
How To Use This DIY Face Wash
- Shake the bottle well to ensure the ingredients are well incorporated. (Between uses the oils and water may separate, this is normal)
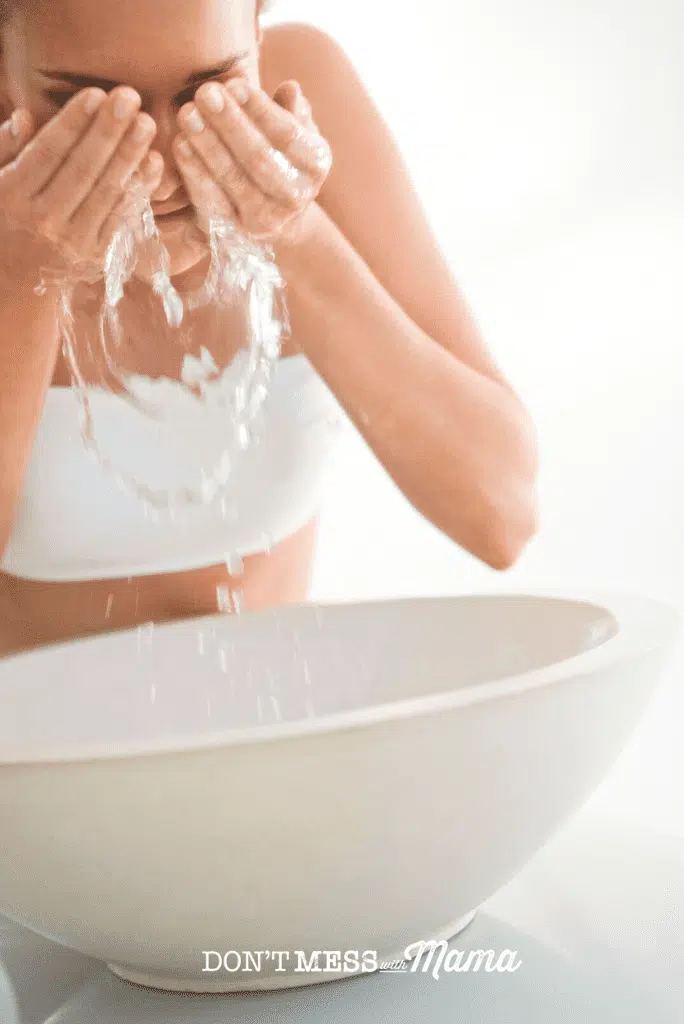
- Wet face with warm water.
- Add 2-3 pumps of DIY Face Wash to the palm of your hand. Then use both hands to massage onto the face.
- Massage face for about 1 minute.
- Rinse with warm water.
- Follow with this DIY Facial Serum.

How to Customize this Homemade Face Wash for Sensitive, Oily and Dry Skin
As mentioned, one of the many joys of a DIY face wash is that you can customize the ingredients depending on your skin goals. In fact, it’s super easy to tweak the ingredients to make this homemade face wash for sensitive, oily and dry skin.
This means you can make different versions depending on the season, time of the month or even to give to friends and family as gifts.
Best Essential Oils for DIY Face Wash
In this face wash recipe I have used Frankincense and lavender essential oil. However, there are so many essential oils for clear skin that will benefit your complexion in different ways.
For example, you can easily customize this face wash with the following essential oils:
- To reduce blemishes: Tea Tree Oil
- To fight pimples on oily skin: Lemongrass Essential Oil
- Reduce scarring: Frankincense Essential Oil
- For dry skin: Myrrh, cucumber seed and sandalwood all work well.
Best Carrier Oils for DIY Face Wash
Choosing a carrier oil for your skin needs is also important when creating this DIY face wash. Carrier oils help the skin absorb the essential oils as well provide various benefits. I’ve used both almond oil and vitamin E oil, however there are many carrier oils for beauty and skin care. Just be sure that the oils you choose are organic, and cold-pressed to maximize results.
A few other alternatives include:
- Rosehip oil: As one of my favorite carrier oils for clear skin, rosehip oil is high in both vitamins A and C. It is particularly beneficial for aging skin and can help reverse signs of sun damage. It is also high in fatty acids which can aid the appearance of scars as well as boost the skin’s elasticity.
- Jojoba oil: There are so many ways to use jojoba oil, from homemade body butter to this DIY face wash. It has a similar consistency to the skin’s natural oil (sebum) which makes it beneficial for acne-prone skin. It is also rich in vitamin E making it ideal for those who struggle with dry or irritated skin.
- Argan oil: Although I love using argan oil in DIY hair serum, it also offers many benefits for acne-prone skin as well as improving skin texture and tone. As it is rich in vitamin E, this also makes it a great carrier oil for fine lines, wrinkles and scars.
How Can I Deep Clean My Face at Home Naturally?
If you are sitting wondering how can I deep clean my face at home naturally, I’ve got you. If you crave that glowing complexion, you can create your own spa day at home using my natural skin care routine.
Best of all, many of these homemade skin care products use the same ingredients,. This means you can reuse, mix and match without additional expense. It also means you can avoid harsh chemicals as you can control the ingredients you are exposing your skin to. Here is a suggested skin care routine which can be tailored to your needs.
- Cleanse – Start with this DIY face wash to deeply cleanse your skin.
- Exfoliate – Next apply an exfoliating facial scrub to remove dead skin cells which can make the face look dull and dry.
- Face Mask – Then, treat your skin to one of these homemade pumpkin masks or honey face masks . They penetrate deep into the skin, supplying it with powerful antioxidants and vitamins.
- Toner – Using a DIY facial toner is then great to remove any last traces of dirt and impurities stuck in your pores. When used regularly toner can help reduce the appearance of your pores for an overall smoother complexion.
- Moisturize – Finally, don’t forget a natural facial serum or moisturizer to maximize your skin’s natural glow and boost hydration.
Why I switched to a Natural Skin Care Routine
Making this DIY face wash is one of the easiest steps to take towards switching to a natural skin care routine. You’ll quickly realize one of the best things about DIY beauty and skin care is the savings.
You can make your own high-quality products like department stores, at really affordable prices and with all-natural ingredients. This means it’s better for your bank balance and skin health.
How much I spend each month:
- Homemade natural apple cider toner – $0.50 per month
- DIY facial oil moisturizer – $4 per month
- DIY face wash – $2 per month
Grand total = $6.50 per month for my new skin care regimen. Compared to $100+ per month with my old department store brands.
Plus, now I use essential oils (which literally cost pennies per drop.) They provide nutrients to nourish and naturally condition my skin without the hefty price tag.
Once you have mastered a natural skincare routine, why not consider making the switch to non-toxic make up too? A natural skincare regimen as well as natural makeup has done wonders for my complexion. The savings and simplicity have also helped me feel better both inside and out.

How to Get Started with Essential Oils
- Sign up for my FREE essential oil email course in order to learn the basics.
- Check out my FREE masterclass all about essential oils and this beginner’s guide to essential oils.
- Get my essential oils online course – complete with video tutorials, e-book and everything you need to get started with essential oils.
- Find out how to buy essential oils at a huge discount + get an additional 10% off your first order with my coupon code. It’s the best deal around and a great way to get started with essential oils. Plus lots of freebies just for you.
More DIY Tutorials
- 100+ DIY Beauty + Skin Care Recipes
- Pumpkin Seed Oil Benefits for Hair and Skin
- DIY Coconut Brown Sugar Scrub
- Best Body Butters for DIY Skin Care
Did you try this? Don’t forget to rate it and comment below to let me know how it went. You can also FOLLOW ME on Facebook, Instagram and Pinterest.
DIY Face Wash
Ingredients
- 3/4 cup cooled organic brewed chamomile tea (or filtered or distilled water)
- 1/4 cup liquid castile soap
- 1/2 tsp organic almond oil
- 3-4 drops vitamin E oil optional
- 8 drops Frankincense essential oil
- 8 drops Lavender essential oil
Instructions
- In a 4 to 6 oz. foaming soap bottle, add liquid Castile soap, organic almond oil and vitamin E oil.
- Add essential oils as needed.
- Fill with chamomile tea or water to the top of the bottle.
- Shake well and use as needed.
Notes
- Shake bottle well.
- Wet face with warm water.
- Add 2-3 pumps of DIY Face Wash to the palm of your hand and then use both hands to massage onto the face.
- Massage face for about 1 minute.
- Rinse with warm water.
- Follow with this DIY Facial Serum.
Want More DIY Recipes?
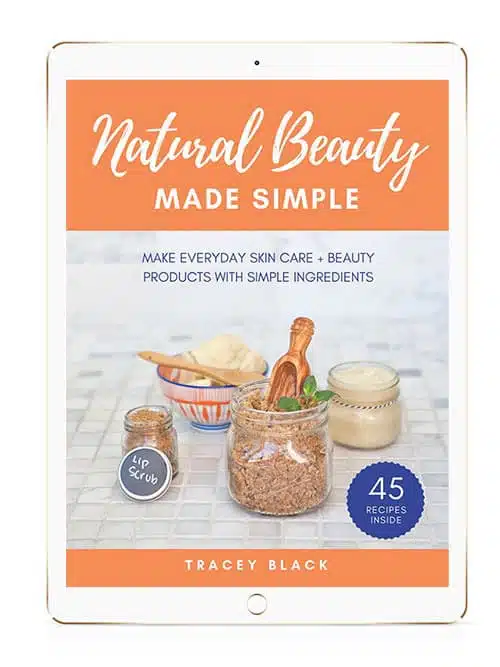
Check out my book Natural Beauty Made Simple. It comes with 45 homemade skincare recipes with a set of printable labels and gift tags. You can download it instantly to your phone, computer or e-reader, so it’s portable and can go with you anywhere!
- Make your own organic beauty and skin care products for less than $25 a month!
- Learn simple techniques to make your own skincare – without the fuss of complicated recipes or hard-to-find ingredients
- Get tried-and-true recipes that work to nourish the skin and make it look more radiant than ever before
- Create beautiful gifts for friends and family with the printable labels and gift tags I’ve included with this book
How long does this keep?
It’ll keep for a couple of weeks. There are no preservatives in it so you’ll want to make small batches and use it up.
How long can I store this face wash?
A couple of weeks. There’s no preservatives in it, so you’ll want to make and use smaller batches and then replenish every couple of weeks.
Can essential oils stain my skin in the sun? I live in Florida and I use sunscreen but still sun is part of our life.
Yes, some essential oils like citrus can make your skin photosensitive. I find that in a mixture like this it’s so diluted that it doesn’t affect my skin personally, but do take caution. Lavender and Frankincense are generally fine and shouldn’t make you photosensitive but you could do a patch test on your skin first.